Featured Golf News
Examples of Green Shapes
In the last chapter, Raquel W. asked about green shapes. I thought I would give an example of how those are developed.

Green shapes evolve during design as a result of the natural green orientation, the sizes required by our sizing criteria and our design concept for the green.
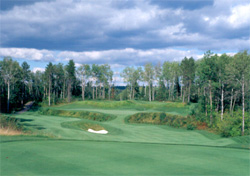
Just as in setting green orientation or target type, most routings end up with a few green sites that cry out for a certain shape. For example, since I like to use at least one "Ribbon Green" (extremely long or wide) I often start green designs by finding the site that accommodates those appropriately — usually a narrow site, like the Quarry's 13th hole — and plug it in early in the process. (As with the NFL, there is always the possibility of a review on that call!)
I then look for large and green sites, sites for green that bend left, right, straight and across the line of play to generally follow my R.O.B.O.T.s for green variety. It includes an attempt to determine which greens (in conjunction with other hole features) should be what target types.
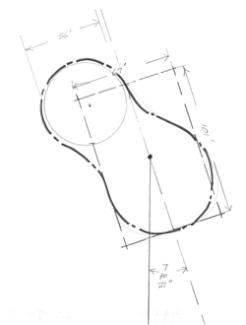
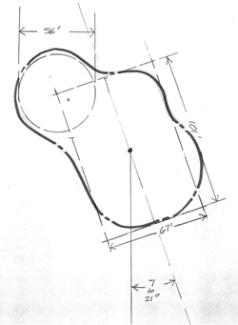
For example, suppose I am designing a Sunday Pin green for a 150-yard approach shot. My sizing criteria (discussed in a previous chapter) suggest a green about 67 feet wide and 101 feet deep for 20-handicappers. I size the main target area for the 20-handicappers, and ADD a premium area, sized for scratch players, somewhere near the perimeter of the green. Scratch players require an area about 56 feet in diameter to stop the ball on similar-length shots.
Although the USGA sizing criteria presumably account for different turf types, topography and wind, I may enlarge the width of the accessible target of my Sunday Pin greens by a few yards of width, at most for specific on-site factors to make them more receptive, including cross wind and/or cross slope lie, an uphill or headwind shot that increases effective playing length, where the green angles against prevailing wind, or when surrounding hazards are particularly difficult and/or the green is blind.
I may increase the depth of the green on tailwind holes, for shots coming from downhill lies (especially long irons), for uphill shots and elevated green targets, and where there are frontal hazards. In each case, the goal of green sizing is to present a fair target.
On the other hand, I favor premium target areas that are right on the edge of achievability to heighten the strategic nuance, so I generally size the premium target at or just under the USGA Scratch Players' chart, regardless of conditions. The desirability of challenging a tucked pin then varies daily, as it should.
After establishing the basic parameters of the green's orientation, size and Sunday Pin location, I then doodle some potential shapes, as shown below. The square box shows the 20-handicapper's main target, and the circle shows I have added a premium pin to the back left of the green. I start with a basic oval, shaped to accommodate the desired characteristics. I still have some flexibility here, and then doodle peanuts, and other shapes until I find the one that best fits the site.
Oval
Placing the Sunday Pin location nearer the edge enlarges the green and exaggerates its shape. In some cases, depending on topography, the protrusion may be very small. I generally exaggerate green shapes more on short approach shots. So, most greens would not be as exaggerated as the examples below.

The Kidney

Two-Lobe

Three-Lobe

Four-Lobe

An "L"-Shaped Green
As you can see from the L-shaped green, I explore all possibilities! The final shape I pick is still largely intuitive, subject to the general rules I wrote to Raquel.
On rounded shapes, it is of course necessary to cut off a few of the corners of the "main target" dimensions, but this doesn't cause me to lose any sleep – these are, after all, only approximations. Naturally, I am looking at potential hazard locations simultaneously, but that is a subject for another day.
Story Options
 |
Print this Story |
